How to Make a Spook-tacular Halloween Charcuterie and Cheese Platter

(Photo: Scott Webb/Unsplash)
Happy All Hallows' Eve, folks. The day of ghouls is upon us, and I’ll admit, Halloween is one of my favorite holidays. I’m a sucker for things that are kind of creepy, kooky, and go thump in the night (I even write horror fiction — check out an old story of mine that was published on Joyland).
One tradition that I do every year is hold a Halloween potluck, and this year, I decided to make a scary charcuterie platter. To put together a meat and cheese platter, my formula is generally as follows.
2+ cheeses, usually a hard cheese, a soft cheese, and/or some kind of goat/blue cheese
2+ meats.
2+ varieties of fruit, ideally some dried and some fresh
something pickled
1+ type of jam and/or honey
When assembling any platter, I always like to fill up the board, because then it’s not only a snack, but also becomes a feast for the eyes. And to keep this one festive, I added some miniature decorative pumpkins, and some on-theme elements, like mozzarella eyeballs and pub cheese pumpkins (the latter of which, I must credit Sugar & Charm). Below are the exact ingredients I used to pull together my board, but you can also add whatever else you prefer to the board, like nuts, crackers, etc.

(Photo: Kimberly Wang)
How to make mozzarella eyeballs
8 oz. bite-sized mozzarella balls
2.25 oz. Canned sliced black olives
A paring knife
Cut a circular hole into the surface of each mozzarella ball and place a sliced olive in the hole. It’s super easy. One thing though, make these eyeballs last. Mozzarella balls need to stay soaking in their liquids as long as possible, because they will shrivel up and dry out if you make them too early.

(Photo: Kimberly Wang)
How to make pub cheese pumpkins
8 oz. pub cheese
Pretzel sticks, broken into thirds for the stem
Italian parsley leaves, cleaned and separated from stems
A chopstick
A small cup of water
Take a spoonful of pub cheese and roll into a ball using your palms. I liked varying the size of these pumpkin cheese balls, so I could have a variously sized pumpkins. Next, take a pretzel stem and press it into your ball. The slight pressure should give your ball more of a flattened gourd shape.
Wet your chopstick in the water and then using just the tip of it, draw lines all around your “pumpkin.” Through trial and error, I found that a chopstick was the most convincing way to draw these lines, and the water helps the cheese from sticking to your utensil.
Place a green parsley leaf (or leafy herb of your choice) onto the top. Refrigerate for at least a half hour before putting on your board to help stiffen these little guys up. They’ll maintain they’re integrity for a little longer.

(Photo: Kimberly Wang)
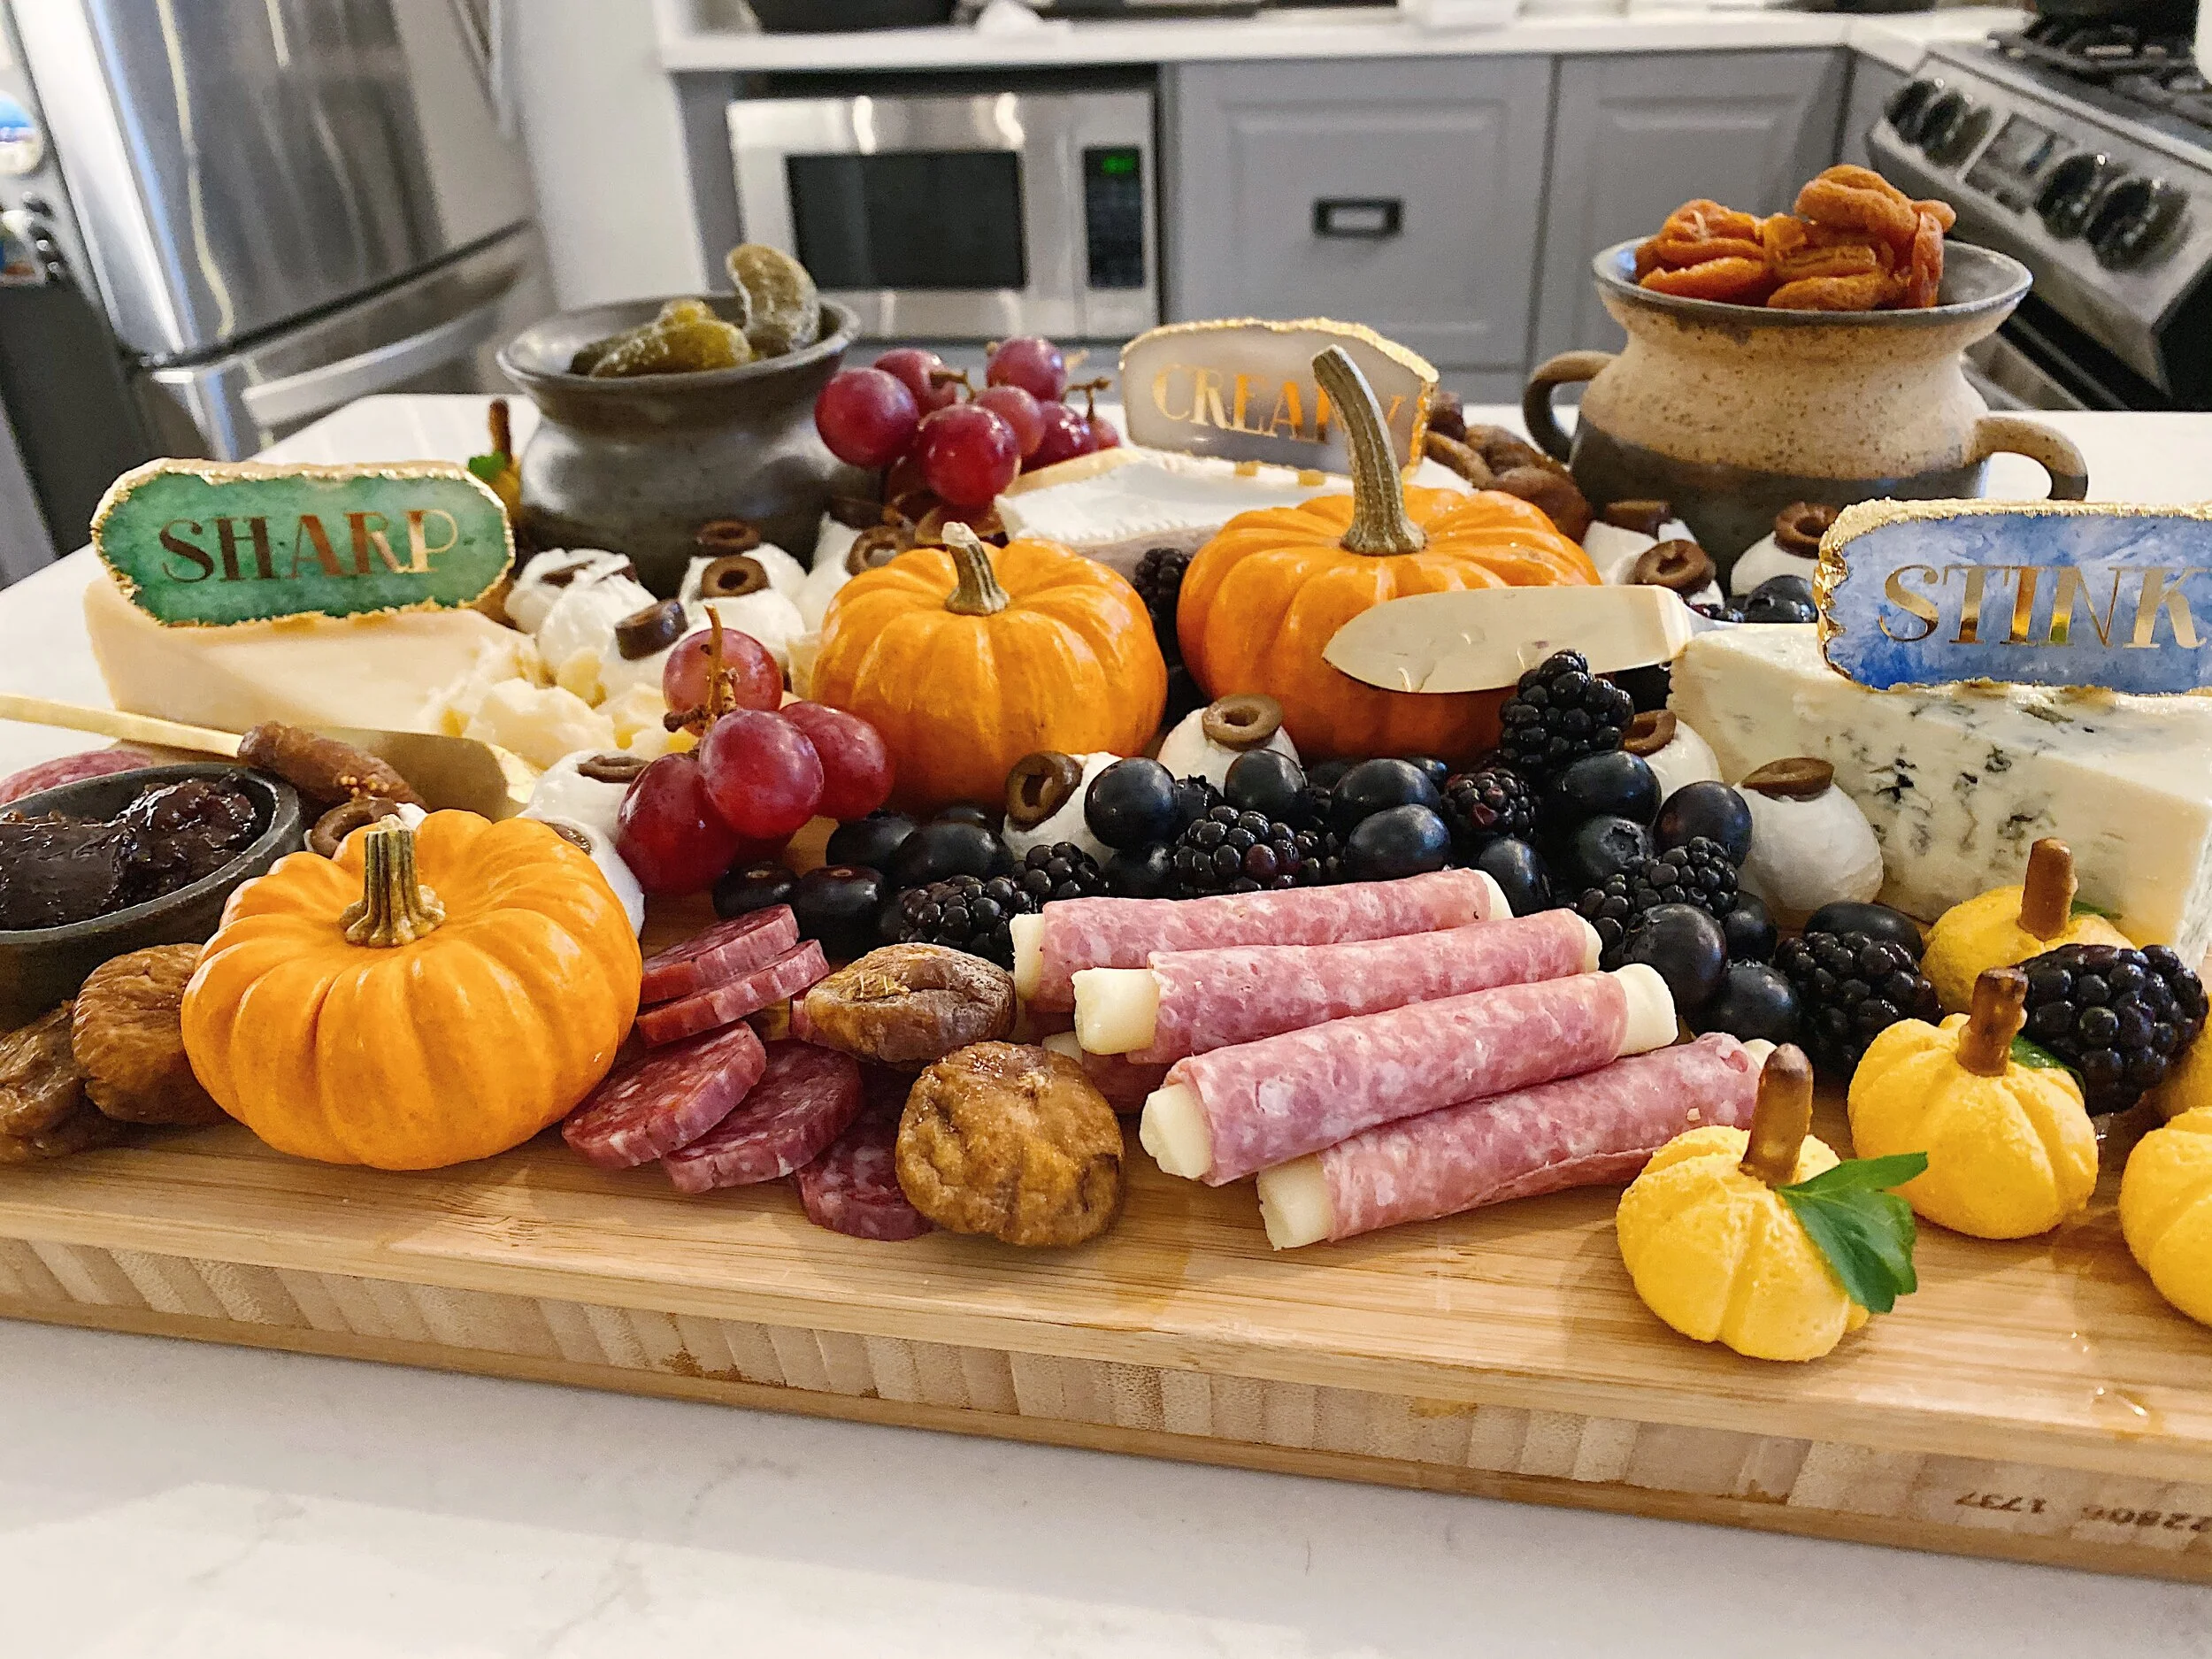
Ingredients
3 kinds of cheese using my aforementioned rule, in this case, it was asiago, brie, and blue cheese
2 kinds of meat, which were 3 oz. Soppressata medallions, and 3 oz. salami wrapped around mozzarella sticks
Blueberries
Blackberries
Red grapes
Dried apricots
Dried figs
Pub cheese pumpkins
Mozzarella and olive eyes
Sweet baby gherkins
Fig jam
Non-edible components
3 small containers, one for holding the pickles, one for holding the fig jam, and one more for good measure — in my case, pieces of pottery I made that most resembled cauldrons. Ramekins and small wooden bowls are also great.
A few decorative mini pumpkins
Cheese knives or pie servers (you can find a similar set here)
Cheese markers (mine were from Anthropologie, but they’re now sold out. However, they are selling another adorable set on their site.)
A cheese board (mine is actually a repurposed cutting board, similar to this one)

(Photo: Kimberly Wang)
Directions
Start by placing largest items first: use the ceramic containers to block out the corners, then add the decorative gourds to the center. This will help give structure to your platter, and also provide support for the smaller things so they don’t roll off. Fill up one container with your pickles (sweet gherkins in my case), and fill the smallest with the fig jam, and the third with a dried fruit (or nuts would have been a great alternative)
Next, spread out the three blocks of cheeses across the board. One thing I learned is most people hate to be the first person to cut into a cheese wedge (IDK why, it’s a weird phenomenon.) To get the party started, use a cheese knife or the sharp end of your pie server and just chunk off some bits and slices of your wedge. Trust me on this.
Place your meats, pub cheese pumpkins, and mozzarella eyeballs around the board. I spread them out all over to keep the board looking fuller instead of focusing them all into one area. The pub cheese pumpkins are perfect for the corners because they won’t roll off the edges. The mozzarella eyeballs did better being wedged between things to keep them in place.
Fill in the empty spaces using your berries, grapes, and dried figs. Add your cheese knives/pie cutters next to each cheese and plug your cheese markers into each cheese. And you’re done!
(Photo: Kimberly Wang)
Stay in touch! Follow me on Instagram and Facebook to be the first to know when I post.
(Featured photo: Kimberly Wang)
While The Off Hours may at times use affiliate links, we always offer genuine editorial recommendations. As an Amazon Associate we earn from qualifying purchases at no additional cost to you.